Wednesday, September 2, 2015

September Is Here!

September is my favorite month... summer is winding down, the air is getting crisp. I also like the fact that it is the end of show season. I had my last show over the weekend. It was at the Bellevue Botanical Gardens, a beautiful setting, filled with lovely plants and people.

Besides getting ready for the event, I did manage to finish some projects this week.

First of all, I made these bracelets from bits of scrap ribbon, baling wire, and upcycled beads.


Then I took some scrap leather and made this bracelet:


I used a sharp pair of scissors to cut channels out of the leather, then punched some holes and inserted silver plated jump rings. The clasp is magnetic.


I also finished this colorful bath mat. It's crocheted denim yarn, made from a few pairs of my old jeans. I tied sari silk and other ribbon scraps to it.


I fixed most of those soldered white heart components that I started last week too:


I made one necklace from one of the hearts:


...and finally, I formulated an amazing rose-scented eye gel. I bought the ingredients, heated them up, and poured them into tiny tins. I'll have the packaging finished this week.


Despite doing the show, I still feel like I accomplished a fair amount this week. I'm sending some of these projects to GreenCraft magazine for publication consideration. The rose eye cream will be submitted to Willow & Sage.

Of all the things that happened this week, my favorite was holding a little bird that hit the window, keeping him safe from eagles and neighborhood dogs until he was well enough to fly off. For me, it's the little things that make life magical.

Until next week!

Leaving you with this quote:

"The air is crowded with birds - beautiful, tender, intelligent birds - to whom life is a song."
-George Henry Lewes


Wednesday, August 26, 2015

MY FIRST WORKBENCH WEDNESDAY!

First of all, I wanted to thank Paulette for her kind words, and Vicky for following me!

This post is really about how I spend a typical week. My friend Brooke Bock of Artistic Endeavors 101 is a true inspiration to me in so many ways. She has this fabulous thing she does every Wednesday. She calls it "Workbench Wednesday," and she shows all the things she has on her workbench for the week.

Here's a link to her wonderful blog:

http://www.artisticendeavor101.blogspot.com/

I asked Brooke if she would mind if I adopted this practice, and in true Brooke Bock fashion, she encouraged me to take up her practice. So this is it... my first official Workbench Wednesday, a glimpse into what I've been working on this week.

First of all, here's the jewelry I made. The first piece is a stamped solder bracelet with faceted vintage crystals. I have to admit, the stamping does not always go smoothly. It takes lots of torching, cooling, and re-torching to get it to work out. This one took four separate torching and stamping sessions. When I was finally finished, I dipped it in Jax Pewter Black, used 0000 steel wool on the surface, touched a bit of gold Gilders Paste to the high spots, and then finally sealed it with Dorland's Wax.


I have a bunch of other stamped pieces ready to go now too. I started working on one, and found that the focal piece just didn't work. That happens sometimes. The bracelet really wanted to be finished differently than I had envisioned, so I ended up with this:


I have always liked the look of a cross worn sideways on a bracelet, and I wanted to make my own version. I used nylon-jawed bracelet-forming pliers to bend the vintage Italian crucifix. The chain is handmade... silver plated copper wire and faux vintage pearls. I dipped this chain in Jax Pewter Black too. I'm a little bit of a Jax junkie.

The two bracelets look nice when worn together.

The other thing that happened this week is that Stampington's Holidays & Celebrations magazine came out, at least I got my advanced contributor's copy. The issue should hit the news stands on September 1st. It's a really pretty issue. I feel fortunate to have my ornaments in there. Here's what they look like:


I used vintage flat-backed chandelier crystals and Grachic 45 paper to give them a really vintage feel.


It sounds strange, but I was oddly inspired by my own article. They always make my work look so much better than I ever could. Anyway this week I decided to make a few more ornaments, this time with a pinecone motif.:


I found the image in an old book about identifying trees. Mr. Bees was a forestry major in collage, and I knew he would have something like that hanging around the house. Of course his first words to me were, "You're not going to cut it up are you?" Nope. I photocopied it. Next I used a watered down solution of Ranger "Vintage Photo" Distress Ink on the paper, and then used Mod Podge to adhere the image to the crystal.

For a change of pace, I also made some melt-and-pour soap this week. I made my own silicone molds, using silicone caulk and dish soap. I colored the soap with food coloring and clay (yep, real clay, the kind I use in my kiln.) The results were really rustic.


The clay settled at the bottom of the molds, highlighting the details. I love surprises like that.


I write articles for a lot of Stampington publications. I love Stampington. I fell in love with the magazines years ago. I began with a few articles in Belle Armoire Jewelry, and since then I've been in Jewelry Affaire, GreenCraft, Holidays & Celebrations, and Somerset Studio. A few months ago I bought my first copy of Willow & Sage. If you are not familiar with this magazine, it is the most fabulous DIY  homemade bath and body publication you could even imagine. My first thought was, "Well why not make some bath products too? Three words apply here: Can of worms.

Now I'm hooked on making bath products. I have two articles that will be appearing in the upcoming issue of Willow & Sage, and I am making several experimental batches of crockpot soap every week. Here's a batch of  hot process Beeswax Honey soap I made over the weekend. I have it drying in my dining room.


I got the honeycomb effect by putting bubble wrap on top of the mold as the bars cured.

Now that I have tried using homemade crockpot soap, I will never be able to go back to using store-bought soap again.

I would be remiss if I didn't show you what I am currently struggling with. A few weeks ago I soldered some copper hearts. I then spray painted them white. The idea was that I would fill them with flower petals. I should also say that I grew the flowers from seeds, pressed the petals, and then sealed them with spray sealant. The idea was to preserve them in Ice Resin. Normally I use blue painter's tape on the backs of open bezels, but I decided to cut corners and use clear mailing tape. It didn't work, and I had a nasty runny resin mess all over everything. I flipped the bezels over and taped the tops, wiping the excess resin off the sides of the bezels. I have to figure out how to finish them. Some will get resin and some will get polymer clay. Here's their current state:
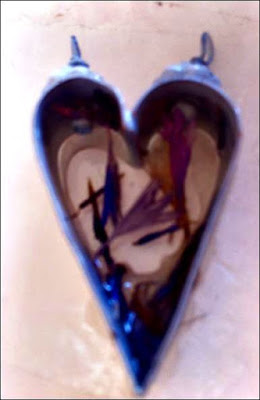


They are completely fixable, but need a little work. I look at it this way... if everything is going completely smoothly, I'm not pushing myself. If I'm hitting snags, then I'm still learning, which is such a good thing.

Well, looking back, this week was about Christmas ornaments, new jewelry processes, fixing mistakes, and making my first batches of soap. Next week, who knows!

Leaving you with this quote:

"Good judgement comes from experience, and experience comes from bad judgement."
-Rita Mae Brown

Wednesday, May 20, 2015

Sea Urchin Spine Necklace


Last week my friend Brooke Bock, of Artistic Endeavors 101, sent me a wonderful gift... a box of beautiful handmade polymer clay beads. Opening the package was like opening a treasure chest, brimming with beautiful baubles. Her polymer clay beads have a fabulous finish, with the look and feel of porcelain. Her thoughtful gift was the inspiration for this necklace.

Brooke made the focal bead and the 5 supporting disc beads on the lower left. As soon as I saw them I knew what I wanted to make.

I had been saving the sea urchin spine for years. It was not drilled, and I wasn't sure how to approach that task. I decided to use my drill press. At first I worried that the delicate spine would shatter, so I approached the task very carefully. It turns out that drilling holes in sea urchin spines is a fairly easy process, much like drilling wood or metal. Going slowly is the key.


To complete the necklace I used faceted quartz beads, in a pinkish brown color, and a handful of vintage African horn beads, rescued from a thrift store. I used 20 gauge black annealed steel wire from Susan Lenart Kasmer's wire collection to make the bead connectors and clasp. The wire can be purchased here:


Brooke sells her lovely beads in her etsy shop:


I am excited about incorporating more of Brooke's inspiring beads into my designs. 

Until next time!

Leaving you with this quote:
"Friendship is born at that moment when one person says to another, 'What! You too? I thought I was the only one' - C.S. Lewis


Tuesday, May 12, 2015

Recycled Bullet Shell and Cookie Tin Earrings

Whenever I go hiking I keep an eye out for bullet shell casings. They come in all sizes, and can be recycled into jewelry-making components.


I love that I used so many reclaimed components to make these. I found the bullet shell casings when we went to southern Oregon on a camping trip. The tin was a gift from a friend. It was full of Key Lime Cooler cookies. After we ate all the cookies, of course I saved the tin. I love the combination of stripes and checkers. 

For these earrings I used a pipe cutter from the hardware store to cut off the bottoms of the bullet shell casings. I used a drill press to put holes in them. A hammer and nail will work on most casings, but I've found that some do need to be drilled out. Next I cut two metal pieces from a cookie tin, filed the edges smooth, and wrapped the tin around the casings, securing them in place with a drop of E6000. Finally, I wired them up with headpins, small frosted black glass beads, green jade beads, crystal spacers and then topped them with more black glass beads.

The crystal spacers were antiqued with Jax Pewter Black and then sealed with Dorland's Wax. Here's where you can buy the Jax:


...and here's where I found the sterling ear wires:

This is a really fun easy project, and they're fun to wear too.

Until next time!

Leaving you with this quote:

"Enjoy NOW like a child and pursue the future like a BULLET." - Colin Wright

Wednesday, May 6, 2015

Easy Staple Bezel And Glass Marble Earrings

Last week I was tidying up my studio and I ran across a couple of small Susan Lenart Kazmer staple bezels that I had in my stash of findings. Sometimes bringing a new set of eyes to familiar findings is such a good thing. As I looked at the shape of the bezels, I thought of my small drawer of marbles and glass globs. Whenever someone sends me flowers, I save the little round glass pebbles that they use to weight the bottom of the vase. I remembered some pretty iridescent pink and pale blue ones. Would they fit?


They did! They were really easy to make. Here's how:  For the pink earrings, I used a the antique bronze staple bezels. They are really easy to use, all you have to do is fold the prongs around the marbles. 

You can buy the staple bezels at http://stampington.com/the-shoppe-at-somerset

It helps to use two pairs of chain-nose pliers and to steady the marble on the table while you are working. I cut two 2" pieces of craft that wire my husband bought for me. He's a nice guy. They came in a package and didn't say the gauge, but I'd have to guess they were somewhere around 16 gauge. I bent the ends with my stepped pliers, using the smallest setting, then I used my bail forming pliers to make the earwires out of 20 gauge brass wire. My ears are not sensitive at all, so brass, copper... anything works for me. For sensitive ears, pre-made niobium earwires work really well. 


After I finished the pink ones, I made a second pair. This time I used the white bronze staple bezels and blue marbles:


For the long pieces, I used anodized steel 18 gauge wire from the hardware store. I used my coiling tool to make some little silver-plated 24 gauge coils to slip over the wires, to make them look a little thicker. I finished by making earwires out of 20-gauge silver-plated wire.

This is a fun little project, super easy to make, and it gives you a chance to use up all those little glass bits you've been hanging onto!

Until next time!

Leaving you with this quote: "Nobody move, I've lost my marbles!" (Or maybe in this case, I've found them!)


Saturday, May 2, 2015

Making A Mason Bee Motel

Okay, this isn't my usual jewelry-related project, but I'm super-excited about this and wanted to share it with you. I am one of those people who puts bugs outside, instead of squishing them. Especially bees. In the spring and summer, when we have a few doors and windows open, I keep a tiny clear jar and a piece of stiff cardboard handy. If a bee wanders inside and can't find its way back out, I catch it in the jar and put it back outside. Lately I've been noticing some bees I haven't seen before. They are smaller than honey bees, and were very gentle when I was trying to save them, not aggressive at all. I did a little research and discovered they are a native species of mason bee. They are fabulous pollinators, and one mason bee can pollinate as many trees as 100 honey bees. They live in holes in wood, but are incapable of making their own holes. One website suggested welcoming them by building bee boxes. I got really excited about the idea. This morning my husband and I made 5 of them.


They were really easy to make. Here's how we did it: We had some leftover post ends from a barn-related project. They were 8 1/2 inches long, and measured 3 1/2 inches square. If you're buying them, they call them  4-by-4's, because that's the size they are when the wood is still wet. It shrinks as it is kiln-dried. We also had some old cedar shingles that we had used to repair the old roof, before we replaced it with a metal one. We sawed the shingles in half and drilled a small hole in the center of each one. For the holes in the wood, where the bees will live, we used a 5/16 inch drill bit. We marked the holes so that they would be at least an inch apart, and drilled them with the drill press. From what I could find out, it didn't really matter if the holes went all the way through or not because the bees would be using mud to block the entrances. No problem there... we live in the Pacific Northwest and mud is plentiful! We attached the roof shingle to the motel with an eye screw and hung each one from a tree. Mason bees apparently like east-facing holes, because they are cold-blooded and need the sun to warm them up in the morning. They also need places that are somewhat sheltered to the wind. We hung a few of them in our apple and pear trees, one in a rhododendron bush, and bolted one to the fence by the raspberry plants. Now we wait. 

With the recent decline in honey bees nation-wide, it seems like giving these little native pollinators a place to live is a really good idea!

Until next time!

Leaving you with this quote: "When the flower blossoms, the bee will come." Hopefully when the bee house is put in the tree, the same thing will happen!

Friday, May 1, 2015

Home At Last Earrings

I'm home now, but I lived about as far away from here as I could possibly have, without leaving the country, that is. Born and raised in Washington State, in a suburb of Seattle, I spent 11 years living in Central, East Coast Florida. While I loved the palm trees and the warm ocean, I was homesick the entire 11 years.

I remember reading somewhere that every animal has a habitat, even people. I used to wonder if maybe I was like a salmon, yearning to return to my place of birth. I live so close to my birthplace now that I actually know the people who own the house my family owned when I was born! I've been home for almost 9 years now, and I am thankful every day.

With that feeling of thankfulness, I set out to make these earrings.


I call them "Home At Last" earrings, and they are made from air-dry paper clay and copper wire.

Here's how I made them:  First I rolled out the paper clay with a rolling pin and cut out two house shapes with a craft knife. I then used the knife to make the outline of the roof line, slicing the clay only about halfway through. Then I found a little piece of metal that had a rectangular shape and stamped the doors and windows into it. I poked a piece of 20 gauge copper wire into the clay and let it dry for three days. Then I put Mod Podge onto the surfaces and dusted the houses with pastel-toned Pearl-Ex powders, finishing them with a top-coating of more Mod Podge. For the circles, I used a chasing hammer on the 18 gauge wire and wrapped it three times around a round handle, finishing by wrapping the tails around the larger circles. Then I made the wrapped loops at the tops of the houses, attaching them to the copper circles. I finished with vintage flowers, puffy hearts and antique copper french earwires. 

It certainly does feel good to be home at last, and wearing these earrings reminds me never to take that feeling for granted!

Until next time!

Leaving you with this quote:  "There is nothing half so pleasant as coming home again." Mary Elizabeth Sangster